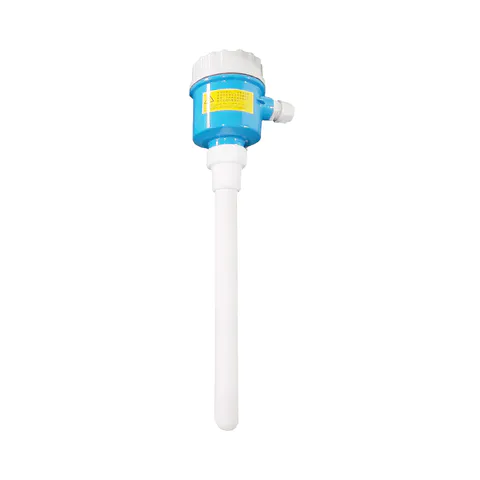


PRODUCT INTRODUCTION
In order to ensure the normal and reliable operation of the instrument, the probe and controller must be installed correctly according to the relevant drawings and actual needs. When the user disassembles the level controller, it is strictly prohibited to apply force to the housing to rotate the probe. Use a wrench to turn it.
a) Common installation methods
1. When installing horizontally, the length of the probe cover G must extend into the wall of the container and tilt it horizontally downward by about 5°.
2. When installing vertically, the distance from the wall should be greater than 200mm, and the total length of the probe S must be greater than or equal to the position of the control point.
3. The distance between the high and low level probes should be greater than 500mm.
4. When using for outdoor installation, a protective cover should be added.
5. Ensure that the instrument case is reliably grounded. A separate ground wire is recommended.
6. Pay attention to the installation space above.
b) Probe installation technical requirements
Installation can generally be determined according to the user's drawing process requirements and actual working conditions, but the following principles should be followed:
1. Installed in an easy-to-access or maintenance location with the shortest connection line and the most convenient wiring.
2. The distance between the front end of the probe and the opposite wall is less than 300mm;
3. Avoid direct sunlight and rain;
4. The spacing between the upper and lower material levels should be greater than 1000mm;
5. The distance from the ash support should be greater than 300mm;
6. The length of the probe deep into the inner wall of the hopper is not less than 450mm, and the lead hole of the electrical box is downward;
7. Separately install the installation pipe horizontally at an angle of 15° (10°-15°) and weld it to the ash wall to ensure air tightness. (When soldering, the probe and the mounting tube must be separated to avoid high temperature melting of the probe wire during soldering;
8. Avoid strong magnetic fields to avoid interference and damage;9. Avoid the blanking hole to avoid the material directly scouring the probe and causing false alarms.
INSPECTION AND NORMAL WORKING CONDITIONS
a) Inspection products are provided with on-site indication function, when inspecting
1. Unscrew the level controller cover, lie on the table, and the probe is hanging out of the table;
2. Connect the power supply correctly, the LCD shows 000;
3. Hold the probe with your hand. After 3 seconds, the relay is closed and the red light is on. When the hand is released, the relay is released after 3 seconds, and the red light is off. If the working mode is set to A01, the opposite is true;
4. The rf level switch function is normal and can be installed on site.
b) normal working condition
The working state of the system when it is not alarming: the red alarm indicator is off;
The working state of the system when it is alarmed: the red alarm indicator is on.
Calibrating:
Click ▽ to display “d20”, then press △▽ to change the value; (Note: you must first click △ and then debug according to the working conditions); after changing, press SET to save and jump to The next menu item “C00” changes the value as the previous step; after changing, press the SET button to save and skip to the next menu item “b00”, and change the value as the previous step;
After changing, press the SET button to save and adjust to the next menu item “A00” to change the value as in the previous step. After the change, click SET until the screen displays the measurement interface “0000”.
Code | Desc. | Default |
A00 | A00 for NO A01 for NC | No |
B00 | B represents the sensitivity (00-09), the higher the value, the higher the sensitivity; | B03 |
C00 | C means the delay (00-60), the larger the value, the longer the delay time; | C00 |
D00 | D represents the value of the capacitor (00-99). The relay switches when the material meets or exceeds the set capacitance when it touches the rf level sensor probe. | D20 |
Special note:
This rf admittance type level switch product has been dynamically simulated and debugged at the time of shipment. Generally, it is not necessary to re-calibrate when the material in the silo changes. However, if there is material in the case of use, but there is no alarm or no material but alarm, please follow the operation again to calibration:
Button | Screen display | Operation instructions | Note: 1. material must be empty when calibrating (or the material is more than 500mm away from the probe) |
SET, △ | 000 | Press and hold these two buttons simultaneously until the screen flashes once and then release at the same time; the screen displays 000 to indicate that the operation has been completed. |
Restore factory defaults:
Button | Screen display | Operation instructions | Default: (d:60/ C:1s / b:4 / a:0) |
SET, △, ▽ | 000 | Press and hold these three buttons simultaneously until the screen flashes once, indicating that the factory defaults have been restored. |
Troubleshooting:
1. power failure:
After checking whether the power supply and its wiring are normal, the following troubleshooting can be performed and checked and repaired:
Fault phenomenon | Reason | method |
The display does not light. | Power disconnect/short circuit/instrument component damage | Check power/send factory repair |
Instrument alarm, control room is not alarmed | Relay damage / signal line connection error | Check relay output / rewiring |
2. probe failure:
First check whether the installation of the probe meets the installation technical requirements before performing the following troubleshooting and maintenance:
Fault phenomenon | Reason | Method |
The material does not touch the probe and the alarm light is on. | High sensitivity | Reduce sensitivity / readjust |
Too close to the wall of the installation barrel | Check the barrel wall | |
Probe short circuit / protective sleeve break | Factory maintenance | |
Electronic component damage | Factory maintenance | |
The material has touched the probe and the alarm light is off. | Sensitivity is too low | Properly improve sensitivity / re-calibrate |
Poor grounding | Check ground | |
Probe open circuit | Factory maintenance | |
Electronic component damage | Factory maintenance | |
Flashing red light | Sensitivity is critical | Properly increase/decrease sensitivity / re-calibrate |
Poor connection of probe or protective sleeve | Check probe or protective sleeve wiring | |
Measured in liquid, stirred tank, interface | Appropriate increase in delay time |
Please Send Us your Application details
Measuring range , medium, Installation method (flange, thread), Pressure range, Remote transmitter, Level alarm switch
More Model available for all appication, different termperture and pressure!
We are here to help you! If you close the chatbox, you will automatically receive a response from us via email. Please be sure to leave your contact details so that we can better assist
Our technical team will check your specifications and make a best solution for you.